We’re excited to share the benefits of growing microgreens hydroponically. This method is easy to learn and has many advantages over growing in soil. By growing microgreens hydroponically, you can have a constant supply of fresh, nutritious greens at home.
With a microgreens hydroponic system, you control the growing conditions. This ensures your microgreens get the right amount of water, nutrients, and light.
The benefits of hydroponic microgreens are many. We’re eager to dive into the details of how to get started. From setting up to harvesting, we’ll cover everything you need to know to start growing your own microgreens at home.
Whether you’re a seasoned gardener or just starting out, growing microgreens hydroponically is rewarding and delicious.
Key Takeaways
- Microgreens are ready to harvest in as little as 10-12 days
- Hydroponic systems use approximately 20 times less water than traditional soil methods
- A well-designed microgreens hydroponic system can save hundreds of hours of labor annually
- Microgreens can be grown year-round in a variety of spaces, including basements and garages
- The ideal pH range for water used in hydroponic systems for microgreens is between 5.5 and 6.5
- Consistently planting microgreens in an extra tray can yield over $300 in additional income monthly
Table of Contents
Understanding Hydroponic Microgreens: A Complete Overview
Hydroponic microgreens are young, nutrient-rich greens grown in various ways. They can be grown using the best hydroponic setup for microgreens. To start growing microgreens hydroponically, it’s key to know the steps and the benefits of a hydroponic microgreens guide.
One big plus of hydroponic microgreens is their high nutritional value. They can be grown in a controlled environment. This means farmers can control temperature, humidity, and light precisely.
What Are Hydroponic Microgreens?
Hydroponic microgreens are young greens harvested in 1-3 weeks after germination. They come from seeds like lettuce, kale, and radish. Hydroponics allows for growing them year-round, benefiting farmers and consumers.
Benefits of Growing Microgreens Without Soil
Growing microgreens without soil has many advantages. It uses about 90% less water than traditional soil gardening. This makes hydroponics a more sustainable choice. Also, hydroponic systems can produce 20-25% more than soil gardening.
Essential Equipment for Your Hydroponic Microgreen Garden
To start growing hydroponic microgreens, we need the right equipment. This includes a hydroponic system, seeds, and a growing medium. It’s important to make sure our microgreens get the hydroponic microgreens nutrients they need for growth.
A basic hydroponic system can be simple or a commercial kit. It’s all about creating a controlled space for our microgreens to grow. We might also need a water pump, air stones, and a pH test kit. These tools help us create the best conditions for our hydroponic microgreens.
Here are some key equipment to consider:
- Hydroponic system: This can be a DIY setup or a commercial kit
- Seeds: Choose a variety of microgreens that are suitable for hydroponic growing
- Growing medium: This can be a soilless mix or a hydroponic medium specially designed for microgreens
- Water pump and air stones: These are necessary for providing oxygen and nutrients to our microgreens
- pH test kit: This is crucial for monitoring and adjusting the pH levels in our hydroponic system
By choosing the right equipment and following tips for hydroponic microgreens, we can ensure our microgreens grow well. With the right tools and a bit of practice, we can enjoy a constant supply of fresh, nutritious microgreens.

| Equipment | Description |
|---|---|
| Hydroponic System | A controlled environment for growing microgreens |
| Seeds | Choose a variety suitable for hydroponic growing |
| Growing Medium | A soilless mix or hydroponic medium for microgreens |
How to Grow Microgreens Hydroponically: Step-by-Step Guide
We’re excited to share our step-by-step guide on growing microgreens hydroponically. First, prepare your growing area. Choose a spot with enough light, as microgreens need 12-16 hours of light daily.
Then, set up your hydroponic system. Pick the right growing medium, like peat or coconut coir. Also, choose a hydroponic system, such as NFT or Flood and Drain. Hydroponic microgreens nutrients are key for healthy growth.
For planting and germination, soak some seeds for 8-12 hours before planting. This helps with germination. For indoor hydroponic microgreens, keep the growing conditions right, including temperature, humidity, and air.

- Prepare your growing area with adequate lighting
- Set up your hydroponic system with a suitable growing medium and nutrients
- Plant and germinate your microgreen seeds using the right techniques
Follow these steps and give your microgreens the right hydroponic microgreens nutrients. You’ll grow tasty and healthy indoor hydroponic microgreens.
Selecting the Best Seeds for Hydroponic Microgreens
Choosing the right seeds is key for a great harvest of hydroponic microgreens. Look for the best hydroponic setup and a good guide for microgreens. With many varieties, knowing each one’s traits is important.
Popular microgreens like arugula, basil, and radish grow fast and yield a lot. They’re great for beginners and do well in a good hydroponic system. For more tips, check a trusted hydroponic microgreens guide.
Think about seed quality, how to store them, and where to buy them. Good seeds germinate better, leading to a better harvest. Keep seeds in good condition to keep them viable. Choose suppliers known for fresh, quality seeds and follow a good hydroponic setup guide.

To get the best results, learn what each variety needs. This includes temperature, light, and nutrients. You can find this info in a detailed hydroponic microgreens guide. By picking the right seeds and using the right growing methods, you’ll get a lot of fresh, healthy microgreens.
| Microgreen Variety | Growth Rate | Yield |
|---|---|---|
| Arugula | Fast | High |
| Basil | Medium | Medium |
| Radish | Fast | High |
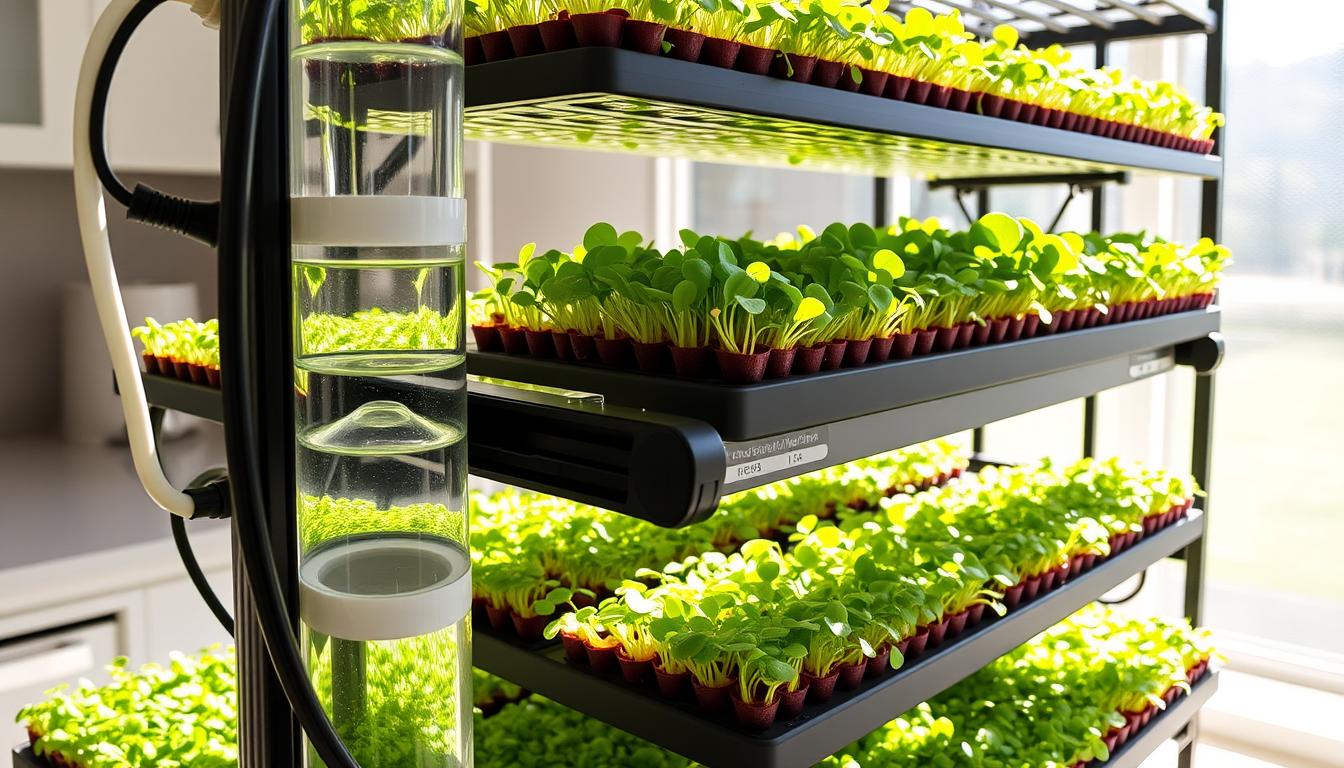
Building Your DIY Hydroponic Microgreen System
Building a microgreens hydroponic system is key. You’ll need a grow tray, a reservoir, and a pump to start. You can use plastic, wood, or even an old container for the tray. Make sure it has good drainage and aeration for your microgreens.
A microgreens hydroponic system can be simple or complex, depending on your budget and preferences. The Nutrient Film Technique (NFT) and Deep Water Culture (DWC) are popular DIY options. Both are great for growing microgreens and can be customized to fit your needs.

When building your system, think about what your microgreens need. Some need more water, while others need more light. Knowing this helps you create a system that meets their needs. This ensures your microgreens grow well and stay healthy.
Popular microgreens for hydroponic systems include broccoli, kale, and mustard. These can be harvested in 1-2 weeks. By following the right steps and using a well-designed system, you can enjoy a fresh harvest all year.
Optimal Growing Conditions for Hydroponic Microgreens
To grow hydroponic microgreens well, we need to focus on a few key things. These include temperature, humidity, lighting, and air flow. These factors help our microgreens grow healthy and strong. It’s also important to keep the nutrient solution balanced for the best growth.
For indoor microgreens, keeping the temperature right is key. The best temperature for starting seeds is between 60°F to 75°F. Once they start growing, they like temperatures between 60°F to 70°F. Keeping humidity between 40-60% helps avoid problems with too much moisture. Microgreens need less light, with a daily light integral (DLI) below 20 mols/m²/day.
Temperature and Humidity Control
By managing temperature and humidity, we can stop mold and fungus. This is very important for indoor microgreens, where moisture can build up. We can use fans, heaters, and humidifiers to keep the environment just right.
Lighting Requirements
Microgreens need different amounts of light, depending on what they are. Some, like lettuce and kale, do well in low light. Others, like radishes and arugula, need more light. Knowing what each variety needs helps us give them the best growing conditions.
Air Circulation Basics
Air flow is crucial to stop mold and fungus in microgreens. It makes sure they get enough oxygen to grow well. This is very important in indoor setups, where air can be harder to move.
By following these tips and keeping the growing conditions perfect, we can make a great place for our microgreens to thrive. With the right mix of temperature, humidity, light, and air flow, we can get a big harvest of fresh, healthy microgreens.
| Factor | Ideal Condition |
|---|---|
| Temperature | 60°F to 75°F (germination), 60°F to 70°F (growth) |
| Humidity | 40-60% |
| Lighting | DLI below 20 mols/m²/day |
| Air Circulation | Adequate air circulation to prevent moisture buildup |
Nutrient Solutions and Water Management
Exploring hydroponic microgreens reveals the critical role of nutrient solutions and water management. A good hydroponic microgreens guide stresses the need for a nutrient-rich solution for healthy growth. Effective water management is key to avoid overwatering or underwatering.
Keeping the temperature between 60-75°F (15-24°C) and providing 12-16 hours of light daily boosts microgreens growth. Hydroponic systems also offer higher yields and less water waste than soil gardening. Here are important points for nutrient solutions and water management:
- Regularly check pH and nutrient balance in the water solution
- Use a balanced fertilizer solution, like 20-10-20, at 100 ppm concentration
- Adjust the nutrient solution based on the microgreens variety’s needs
By following these tips and a well-designed hydroponic microgreens guide, growers can optimize their nutrient and water strategies. This leads to a bountiful harvest. With proper care, microgreens can be ready in 7-14 days, offering fresh, nutritious greens all year.
Here’s a summary of key statistics for nutrient solutions and water management in hydroponic microgreens:
| Statistic | Value |
|---|---|
| Ideal temperature range | 60-75°F (15-24°C) |
| Light exposure | 12-16 hours per day |
| Water usage | Significantly less than traditional soil-based gardening |
| Yield | Higher than traditional soil methods |
By understanding and applying these strategies, growers can maximize hydroponic microgreens’ potential and enjoy a successful harvest.
Common Problems and Solutions in Hydroponic Microgreen Growing
Growing hydroponic microgreens can face common problems. Disease prevention is a big one. High humidity can cause mold, a big issue in warmer places. Keeping the right temperature and humidity is key.
Pest management is also crucial. Weak seedlings can attract pests, harming our microgreens. To prevent this, we need seeds that germinate well, over 75%. Store seeds in sealed bags and use them quickly.
Dealing with growth issues is important too. Uneven seeding can lead to poor germination. It’s vital to level and pack the growing medium right. Also, seedlings need enough light to grow well. Fixing these problems helps our microgreens grow strong.
Here are some helpful tips:
- Keep the growing conditions right, like temperature and humidity
- Make sure seeds germinate well
- Give seedlings enough light
- Level and pack the growing medium well
By following these tips, we can tackle common problems. This way, we can enjoy the benefits of hydroponic microgreens. These include more crops and less waste.
Harvesting and Storage Techniques
Timing is key when it comes to harvesting and storing hydroponic microgreens. We suggest picking them 5 days after they’re fully grown. They should be 1-2 inches tall with 3 leaves for the best taste and nutrients.
Knowing how to harvest and store microgreens is crucial. A hydroponic system can produce a lot of crops. But, if not stored right, they can lose freshness fast. Store them in a plastic bag with paper towels to keep them dry.
Here are some tips for harvesting and storing microgreens:
- Harvest microgreens when they are 1-2 inches tall and have 3 leaves
- Store microgreens in a plastic bag lined with paper towels
- Keep microgreens dry and refrigerated to maintain freshness
By following these tips and using a good hydroponic system, you can enjoy fresh microgreens all year. Whether for personal use or business, knowing how to grow microgreens hydroponically is key to success.
| Microgreen Variety | Harvest Time | Storage Method |
|---|---|---|
| Pea Shoots | 7-10 days | Refrigerate in a plastic bag |
| Radish Greens | 5-7 days | Store in a cool, dry place |
| Cilantro | 7-10 days | Refrigerate in a plastic bag lined with paper towels |
Scaling Up Your Hydroponic Microgreen Production
When we talk about hydroponic microgreens, scaling up is key. A good guide can help you grow more efficiently. Understanding growth factors like nutrient solution strength and temperature is crucial. This way, you can meet the growing demand.
Some key considerations for scaling up include:
- Increasing the size of your growing area to accommodate more plants
- Implementing a more efficient nutrient delivery system to support larger crops
- Monitoring and controlling temperature, humidity, and light levels to optimize growth
Studies show hydroponic microgreens can grow a lot with the right nutrients. They can gain up to 24.64g, more than with other methods. Using calcium nitrate can even double this gain. By following a detailed guide, you can maximize your production.
Scaling up lets you meet the increasing demand for these healthy greens. With the right approach, you can boost yields and cut costs. Hydroponic microgreens are a great choice for anyone starting in indoor agriculture.
| Factor | Effect on Growth |
|---|---|
| Nutrient Solution Strength | Increases growth rate and yield |
| Temperature | Optimal range: 75-80°F (24-27°C) |
| Lighting | Essential for photosynthesis and growth |
Cost Analysis and Profit Potential
Starting a hydroponic microgreens business requires looking at costs and potential profits. You need to buy equipment and seeds first. Seeds for microgreens cost about $10 per pound. Weekly seed costs can be between $100 to $200, depending on how much you grow.
Other costs include $5 for growing medium, $37.50 for water and electricity, and more. Labor, packaging, and other expenses add up. To make money, you should use smart pricing methods like cost-plus and value-based pricing.
Knowing the costs and following a successful plan can lead to big profits. The global microgreens market is expected to hit USD 2.6 Billion by 2031. This shows there’s a lot of potential for making money by growing microgreens hydroponically.
Conclusion: Starting Your Hydroponic Microgreen Journey
The world of hydroponic microgreens is exciting and rewarding for both home growers and urban farmers. This hydroponic microgreens guide has given you the tools to start your journey.
There are many reasons to grow hydroponic microgreens. You might love the nutrition, the feeling of self-sufficiency, or the chance to enter a growing market. With some practice and the right tips for hydroponic microgreens, you can grow tasty, vibrant greens at home.
So, why wait? Begin your hydroponic microgreen adventure today. Enjoy fresh, nutritious produce and the joy of a successful harvest. Let’s grow together and make a greener, healthier future, one microgreen at a time.
Can I grow microgreens hydroponically?
Yes, microgreens can be easily grown hydroponically using a shallow tray, water, and a growing mat like coconut coir or hemp fiber. They don’t need nutrient-rich solutions at first—just light, moisture, and airflow. It’s one of the simplest and fastest ways to grow fresh greens at home.
What is a possible downside to microgreens?
A possible downside is that microgreens are delicate and have a short shelf life, especially without refrigeration. Also, since they’re grown densely, poor airflow or excess moisture can lead to mold or damping-off disease—especially in poorly maintained setups.
Are hydroponic microgreens better than soil?
Hydroponic microgreens are cleaner, faster to grow, and easier to harvest than soil-grown ones. There’s less mess, no need for compost, and fewer pests. However, soil-grown microgreens may have a slightly richer flavor and higher microbial diversity, which some growers prefer.
What are the best microgreens for hydroponics?
The best microgreens for hydroponic growing include:
Radish – Fast-growing with a spicy flavor.
Broccoli – Packed with nutrients and grows uniformly.
Sunflower – Crunchy and protein-rich.
Pea shoots – Mild, sweet flavor with tender stems.
These varieties germinate quickly and thrive without soil
1 thought on “Hydroponic Microgreens: Easy Tips to Grow at Home”
Comments are closed.