

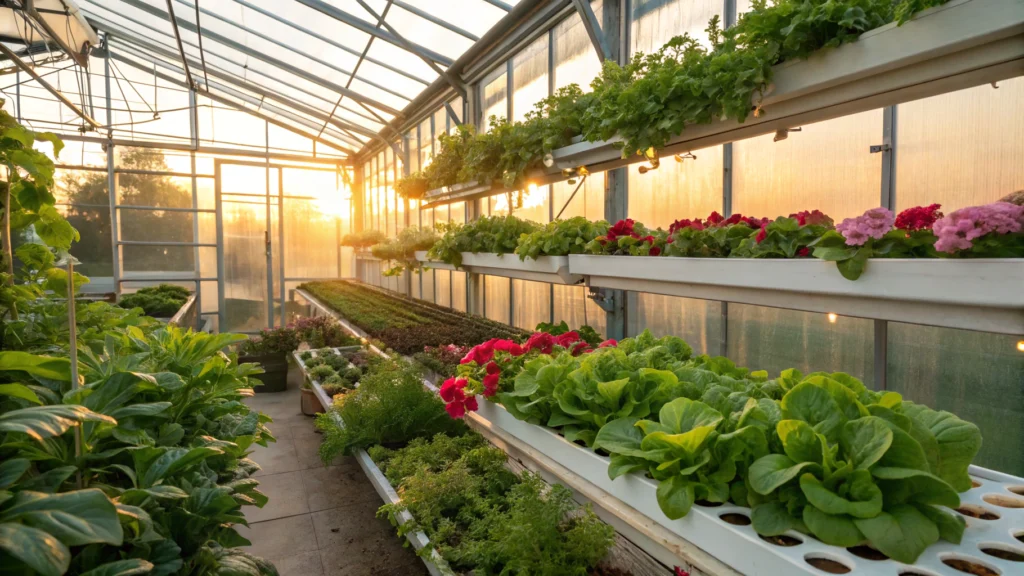
Have you ever dreamed of harvesting fresh, pesticide-free vegetables year-round, regardless of weather or season? That first bite of a tomato you’ve grown yourself in the dead of winter can be transformative. I remember the moment I tasted my first hydroponic lettuce – crisp, flavorful, and bursting with nutrients that store-bought produce simply couldn’t match. This experience changed my relationship with food forever, and it’s what inspired me to build my first hydroponic greenhouse.
The beauty of a hydroponic greenhouse lies not just in its efficiency but in its accessibility. Whether you’re a seasoned gardener looking to extend your growing season or a novice eager to start your self-sustainability journey, building your own hydroponic greenhouse is both achievable and deeply rewarding. And the best part? You can complete it in just 5 days.
In this comprehensive guide, I’ll walk you through the exact process I’ve refined over years of building hydroponic systems, helping countless gardeners transform their growing potential with minimal time investment.
Table of Contents
Day 1: Planning Your Hydroponic Greenhouse
Selecting the Perfect Location
The foundation of a successful hydroponic greenhouse begins with location selection. Your greenhouse needs at least 6-8 hours of daily sunlight, especially during winter months when light is scarce. Southern exposure is ideal in the northern hemisphere, providing maximum sunlight throughout the year.
Consider these factors when choosing your greenhouse location:
- Sunlight exposure: Analyze sun patterns across your property
- Access to utilities: Proximity to water and electricity
- Wind protection: Natural windbreaks or fencing options
- Level ground: Relatively flat terrain or easily leveled area
- Drainage patterns: Areas that don’t collect standing water
Determining Size and Budget
Your hydroponic greenhouse size should balance your growing ambitions with practical constraints. For beginners, I recommend starting with a structure between 8×10 feet and 10×12 feet, which provides enough space for experimentation without overwhelming maintenance.
Budget considerations typically fall into these categories:
| Component | Percentage of Budget | Notes |
|---|---|---|
| Greenhouse Structure | 30-40% | Frame, covering, foundation |
| Hydroponic System | 25-30% | Growing containers, pumps, reservoirs |
| Climate Control | 15-20% | Ventilation, heating, cooling |
| Nutrient & Water System | 10-15% | Nutrients, filters, distribution |
| Lighting (if needed) | 5-10% | Supplemental grow lights |
For a basic 10×10 greenhouse with a simple hydroponic setup, expect to spend between $1,500-$3,000 depending on material choices and system complexity.
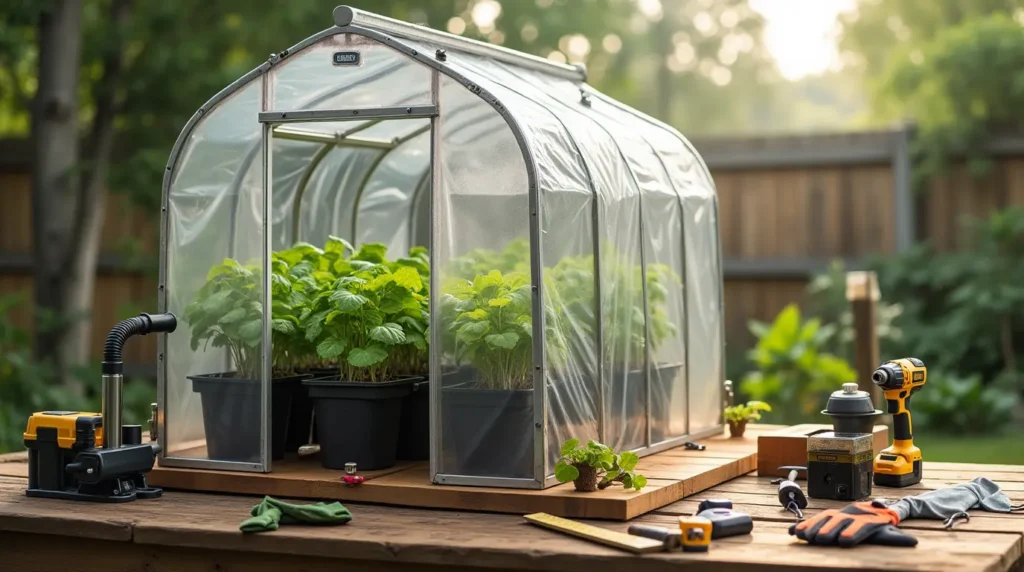
Gathering Materials and Tools
Creating a comprehensive shopping list is crucial for efficient construction. Here’s what you’ll need:
Greenhouse Structure Materials:
- Greenhouse frame kit or lumber for custom frame
- UV-resistant polycarbonate panels or greenhouse-grade polyethylene film
- Foundation materials (concrete blocks, pressure-treated lumber, etc.)
- Fasteners (screws, bolts, brackets)
- Door hardware and vents
Hydroponic System Materials:
- Growing containers (NFT channels, Dutch buckets, or growing trays)
- Reservoir tanks (food-grade plastic)
- Water pump and air pump with air stones
- PVC pipes and fittings for plumbing
- Growing medium (rockwool, coco coir, expanded clay pellets)
- pH and EC meters
- Hydroponic nutrients
Tools Required:
- Drill and bits
- Circular saw or hand saw
- Measuring tape and level
- Screwdriver set
- PVC cutter
- Utility knife
- Safety equipment (gloves, goggles)

Day 2: Building the Greenhouse Structure
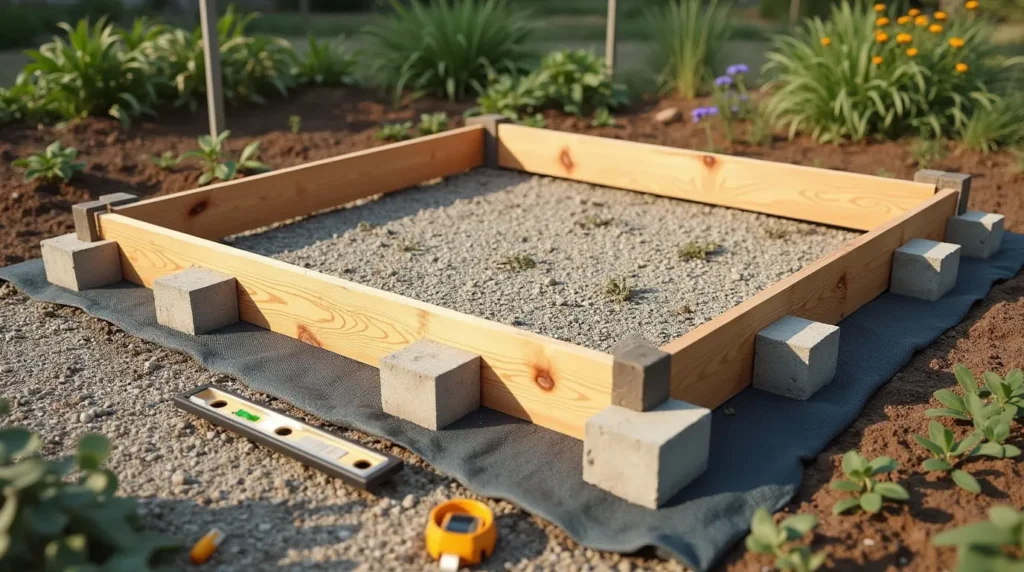
Laying the Foundation
A solid foundation ensures your hydroponic greenhouse remains stable through changing weather conditions. For a semi-permanent structure, consider these foundation options:
- Concrete block perimeter – Affordable and provides good stability
- Pressure-treated lumber base – Easy to construct and adequate for smaller structures
- Gravel pad with landscape fabric – Excellent drainage with minimal permanence
- Concrete slab – Most durable but requires more investment and preparation
For most DIY hydroponic greenhouses, a pressure-treated lumber base anchored with concrete blocks at the corners provides an excellent balance of durability and cost-effectiveness.
Step-by-step foundation construction:
- Mark your greenhouse perimeter using stakes and string
- Level the ground completely, removing any vegetation
- Add a layer of landscape fabric if using gravel
- Install pressure-treated 4×4 posts at each corner, secured with concrete
- Connect corner posts with pressure-treated 2×6 lumber to form the base frame
- Check that base is square by measuring diagonally from corner to corner
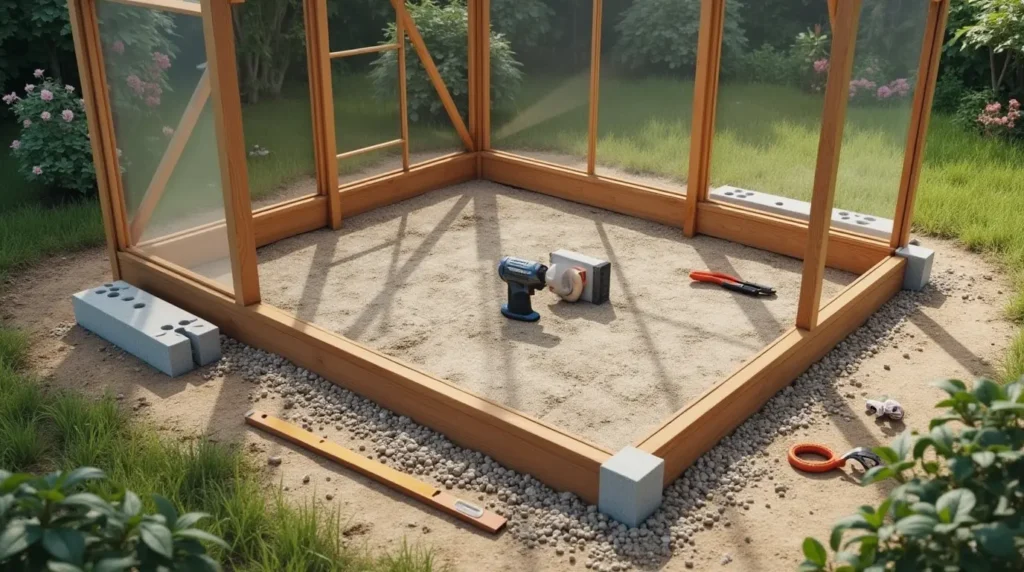
Assembling the Frame
The frame provides structural integrity for your hydroponic greenhouse. Whether you’re using a kit or building from scratch, follow these steps:
- Lay out all frame pieces according to your plan
- Begin by securing vertical supports to the base at equal spacing
- Install horizontal supports, working from bottom to top
- Add roof trusses or rafters, ensuring proper pitch for water runoff
- Install door frame and ventilation openings
- Double-check all connections and reinforce as needed
Pro Tip: When building from scratch, consider using galvanized steel connectors at joints to increase strength and longevity of your wood frame.
Installing Covering and Access
The covering material determines light transmission, heat retention, and durability of your hydroponic greenhouse. For most home gardeners, twin-wall polycarbonate panels offer the best balance of affordability, durability, and insulation.
Covering installation process:
- Start at the bottom and work upward
- Secure panels with UV-resistant washers and screws
- Seal joints with appropriate greenhouse tape
- Install door with proper weatherstripping
- Add automatic vent openers on roof panels
For entry points, consider a 36-inch door for easy access with equipment. Install at least two vents: one near the floor and one near the roof to create proper convection airflow.
Day 3: Installing the Hydroponic System
Choosing the Right Hydroponic Method
Different hydroponic systems offer varying advantages for different crops and experience levels:
| System Type | Best For | Difficulty Level | Water Usage |
|---|---|---|---|
| Deep Water Culture (DWC) | Leafy greens, herbs | Beginner | Medium |
| Nutrient Film Technique (NFT) | Lettuce, herbs, small plants | Intermediate | Low |
| Dutch Bucket | Tomatoes, peppers, cucumbers | Beginner | Medium |
| Ebb and Flow | Versatile for most plants | Intermediate | Medium-High |
| Vertical Towers | Space-saving for herbs & greens | Beginner | Low |
For beginners building their first hydroponic greenhouse, I recommend a combination system: NFT channels for leafy greens and Dutch buckets for fruiting plants. This combination maximizes growing potential while remaining manageable.
Building Growing Containers
NFT Channel Construction:
- Use 4-inch PVC pipes cut to desired length (usually 8-10 feet)
- Drill 2-inch holes on top at 8-inch intervals for net pots
- Create a slight slope (1-2%) for proper water flow
- Install end caps with drainage on the lower end
- Connect to the main water distribution manifold
Dutch Bucket Setup:
- Position 5-gallon food-grade buckets in rows
- Drill 1-inch drainage hole approximately 2 inches from bottom
- Install drain fitting with screen to prevent medium from escaping
- Connect buckets in series with drainage line
- Create a return system to main reservoir
Setting Up Nutrient Delivery
The heart of your hydroponic greenhouse is the nutrient delivery system. Components include:
- Main reservoir: 55-100 gallon food-grade container
- Submersible pump: Select based on system size (typically 250-800 GPH)
- Distribution manifold: PVC pipe with adjustable outlets for each growing container
- Return system: Drainage pipes that collect and return water to reservoir
- Air pump with air stones: Provides oxygen to nutrient solution
Assemble the system with these steps:
- Position reservoir at the lowest point of your system
- Install the submersible pump with filter
- Connect main distribution line from pump
- Add outlets with valves to control flow to each section
- Create drainage channels that return to reservoir
- Add air stones to reservoir for oxygenation
Day 4: Setting Up Water and Electrical Systems
Water System Installation
Reliable water management is critical for hydroponic success. Your system requires:
- Primary water supply: Connection to municipal water or well
- Filtration: Sediment filter and optional reverse osmosis system
- Automatic top-off system: Float valve to maintain reservoir levels
- Drainage overflow: Emergency overflow protection
- Water testing equipment: pH meter, EC/TDS meter, and test kit
For water conservation, consider adding:
- Rainwater collection system from greenhouse roof
- Condensation recovery channels
- Programmable timers for irrigation cycles
Electrical Setup and Automation
Safe and efficient electrical systems power your hydroponic greenhouse:
Essential electrical components:
- Weather-resistant GFCI outlets (minimum 2-3)
- Waterproof junction boxes and conduit
- Timer systems for pumps and lighting
- Environmental controllers for advanced automation
- Backup power options for critical systems
Always consult a licensed electrician if you’re uncomfortable with electrical work. For basic automation, install:
- Programmable timers for lights and pumps
- Temperature-activated vent controllers
- Simple environmental controller for data logging
- Smart plugs for remote monitoring and control
Climate Control Implementation
Maintaining optimal growing conditions requires balanced climate control:
Temperature management:
- Install shade cloth for summer cooling (50-60% shade recommended)
- Add small heater with thermostat for winter (sized to greenhouse volume)
- Install horizontal air flow fans for circulation
- Use thermal mass (water barrels painted black) for passive temperature regulation
Humidity control:
- Add dehumidifier for high humidity periods
- Install misting system for low humidity conditions
- Create automated ventilation based on humidity sensors
CO2 enrichment (optional):
- Natural methods include compost bins within greenhouse
- Commercial CO2 generators can significantly increase plant growth
Day 5: Adding Plants and Final Touches
Starting Seeds and Transplanting
Begin your hydroponic greenhouse journey with these planting strategies:
- Seed starting: Use rockwool cubes or coco coir plugs moistened with quarter-strength nutrient solution
- Seedling care: Maintain under grow lights until second set of true leaves appear
- Transplanting process: Carefully transfer seedlings to net pots with growing medium
- Initial nutrient solution: Start with half-strength solution for young plants
Recommended starter plants for hydroponic success:
- Lettuce (matures in 30-45 days)
- Basil and herbs (continuous harvesting)
- Spinach and kale (nutritional powerhouses)
- Strawberries (productive and space-efficient)
Calibrating Nutrients and pH
Proper nutrient balance is essential for hydroponic success:
Basic nutrient management:
- Start with commercial hydroponic nutrient solutions designed for your plants
- Maintain EC/TDS between 1.0-2.5 depending on plant varieties
- Check pH daily, adjusting to 5.8-6.2 for most plants
- Change reservoir water completely every 2-3 weeks
- Document readings and plant response to build your knowledge
Pro Tip: Create a dedicated monitoring station with testing equipment, adjustment solutions, and a logbook to track your system’s performance.
Final System Testing and Optimization
Before full operation, thoroughly test your hydroponic greenhouse system:
- Run all pumps and verify water flow throughout system
- Check for leaks at all connections
- Test electrical systems and automation
- Verify temperature fluctuations over 24 hours
- Create maintenance schedule and emergency procedures
- Install monitoring systems (optional WiFi sensors)
Ongoing Maintenance for Your Hydroponic Greenhouse
Daily Maintenance Tasks
- Check water levels in reservoir
- Test and adjust pH/EC levels
- Inspect for pest activity
- Monitor plant health
- Ensure proper system operation
Weekly Maintenance Schedule
- Clean filters and irrigation lines
- Prune plants as needed
- Add fresh nutrients as required
- Clean work surfaces and tools
- Check structural components
Monthly System Overhaul
- Complete reservoir change and cleaning
- Deep clean all growing containers
- Inspect and maintain pumps
- Check covering for damage
- Calibrate all testing equipment
Conclusion: Your Sustainable Growing Journey
Building a hydroponic greenhouse in just 5 days marks the beginning of an incredible journey toward food independence and gardening mastery. The system you’ve created will evolve as you gain experience, allowing you to grow more food with less water and effort than traditional gardening.
Remember that your first growing cycles are learning experiences. Document what works, adapt what doesn’t, and share your knowledge with others. The hydroponic community is incredibly supportive and always innovating.
As you harvest your first crops, you’ll experience that same moment of revelation I had years ago—tasting food that’s genuinely fresh, grown without harmful chemicals, and produced right outside your door regardless of climate challenges. This self-sufficiency is empowering in unpredictable times.
Your hydroponic greenhouse isn’t just a growing space; it’s a statement about taking control of your food supply while reducing environmental impact. Welcome to a more sustainable, productive, and rewarding approach to gardening!
FAQ About Building a Hydroponic Greenhouse
How much does it cost to build a hydroponic greenhouse?
Building a basic hydroponic greenhouse typically costs between $1,500-$3,000, depending on size, materials, and system complexity. Premium setups with automation can range from $5,000-$10,000.
Can I really build a hydroponic greenhouse in just 5 days?
Yes, a basic hydroponic greenhouse can be constructed in 5 days with proper planning, materials ready, and 6-8 hours of work each day. More complex systems may require additional time.
What’s the ideal size for a beginner’s hydroponic greenhouse?
For beginners, an 8×10 or 10×12 foot hydroponic greenhouse provides enough space to experiment with different crops without overwhelming maintenance requirements.
How much electricity does a hydroponic greenhouse use?
A small hydroponic greenhouse typically uses 1-3 kWh per day for basic operations. This increases if supplemental lighting or heating is required during winter months.
What are the best plants to grow in a hydroponic greenhouse?
Leafy greens (lettuce, spinach), herbs (basil, mint), and fruiting plants (tomatoes, peppers, cucumbers) thrive in hydroponic greenhouses, offering quick returns and continuous harvesting.