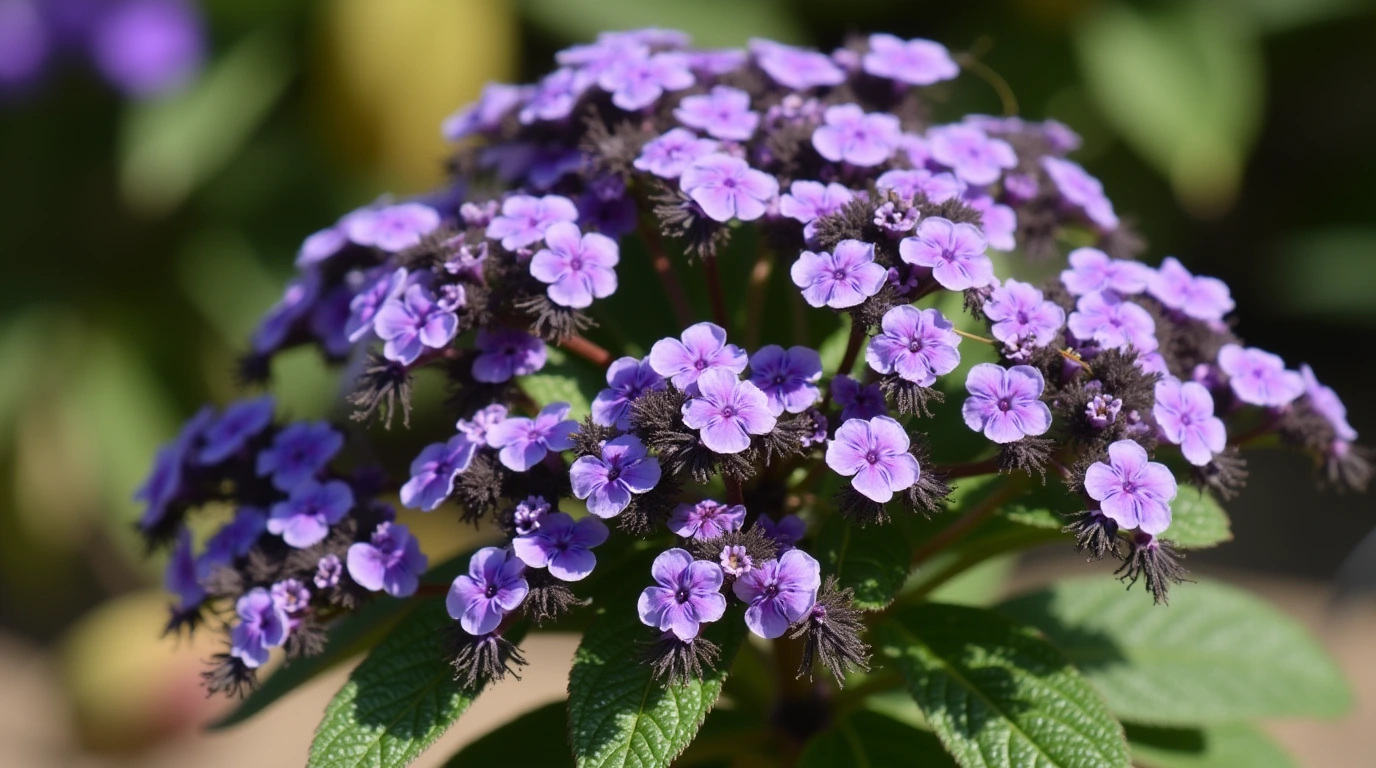
There’s something magical about walking through a garden and being enveloped by the sweet vanilla scent of heliotropes in full bloom. These charming purple-blue flowers have captivated gardeners for generations, earning them the nickname “cherry pie plant” for their deliciously sweet fragrance. When I planted my first heliotrope seven years ago, I was instantly transported back to my grandmother’s garden that intoxicating scent bringing memories flooding back of summer afternoons spent among her carefully tended flower beds.
Heliotropes aren’t just beautiful and fragrant; they’re also versatile garden additions that can thrive in various settings when given proper care. Whether you’re a seasoned gardener or just beginning your plant journey, these distinctive flowers with their clusters of tiny blooms deserve a place in your garden.
In this comprehensive guide, we’ll explore everything you need to know about how to grow and Care for Heliotropes plants, from selecting the right variety to keeping them healthy and vibrant throughout the growing season.
Table of Contents
Understanding Heliotropes
What Are Heliotropes?
Heliotropes are flowering plants belonging to the borage family (Boraginaceae). Native to Peru, these ornamental plants have become popular worldwide for their distinctive clusters of small, fragrant flowers and their interesting growth habits.
The name “heliotrope” comes from the Greek words “helios” (sun) and “tropos” (turn), referring to the plant’s tendency to turn toward the sun—a characteristic known as heliotropism. This sun-tracking behavior is fascinating to observe and speaks to the plant’s love for bright conditions.
Popular Heliotrope Varieties
| Variety | Flower Color | Height | Special Characteristics |
|---|---|---|---|
| Marine | Deep purple | 12-18″ | Intense fragrance, compact growth |
| White Lady | Pure white | 12-24″ | More heat tolerant, subtle fragrance |
| Fragrant Delight | Lavender-blue | 18-24″ | Strong vanilla scent, large flower clusters |
| Mini Marine | Deep purple | 8-12″ | Dwarf variety, perfect for containers |
| Azure Skies | Light blue | 18-24″ | Larger blooms, good for cutting |
| Nagano | Purple-blue | 12-18″ | Improved disease resistance |
Growth Characteristics
Heliotropes typically grow as tender perennials in USDA zones 9-11, but are commonly grown as annuals in cooler regions. They feature:
- Oval, slightly rough textured, deep green leaves
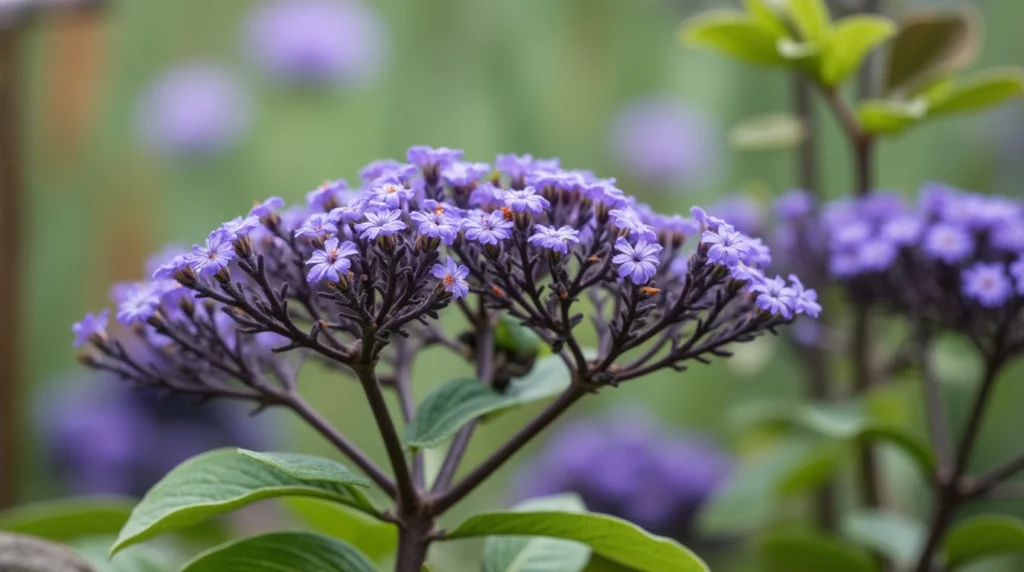
- Clusters of small, star-shaped flowers
- Heights ranging from 1-4 feet, depending on variety
- Bushy, mounded growth habit
- Flowering periods from late spring through fall
Getting Started: Planting Your Heliotropes
When to Plant Heliotropes
Timing is crucial when planting heliotropes. These heat-loving plants are sensitive to cold and frost, so planning your planting schedule carefully is essential.
- Spring planting: Wait until after the danger of frost has passed and soil temperatures reach at least 60°F (15°C)
- Indoor start: Begin seeds indoors 8-10 weeks before your area’s last frost date
- Fall planting: Only recommended in zones 9-11 where winters are mild
Selecting the Perfect Location
Heliotropes have specific preferences when it comes to their growing environment:
Light Requirements
Heliotropes love sunlight but appreciate some afternoon shade in hotter climates. For optimal growth:
- Northern regions: Full sun (6+ hours daily)
- Southern regions: Morning sun with afternoon shade
- Indoor growing: Bright, south-facing windows
Soil Conditions
The right soil composition makes a significant difference in heliotrope performance:
- Well-draining, loamy soil
- Rich in organic matter
- Slightly acidic to neutral pH (6.1-7.3)
- Not compacted or heavy clay
Planting Methods
From Seeds
Starting heliotropes from seeds requires patience but can be rewarding:
- Begin indoors 8-10 weeks before last frost
- Use seed-starting mix in small pots or cells
- Place seeds on surface and press lightly (don’t cover, as they need light to germinate)
- Keep soil consistently moist at 70-75°F (21-24°C)
- Expect germination in 14-28 days
- Transplant outdoors after hardening off and when night temperatures stay above 50°F (10°C)
From Transplants
Purchasing young plants offers a head start:
- Choose healthy specimens with no signs of pests or disease
- Dig holes slightly larger than the root ball
- Space plants 12-18 inches apart
- Plant at the same depth as in the original container
- Water thoroughly after planting
- Apply a thin layer of mulch around plants (keeping it away from stems)
Essential Guide Care for Heliotropes
Watering Techniques
Proper watering is perhaps the most crucial aspect of heliotrope care:
- Frequency: Keep soil consistently moist but not waterlogged
- Method: Water at the base to avoid wetting foliage
- Timing: Early morning is ideal to allow leaves to dry during the day
- Summer care: Increase watering during hot periods, possibly daily in containers
- Winter care: Reduce watering for overwintered plants to prevent rot
“The art of watering heliotropes lies in finding that perfect balance—not too dry, not too wet. When in doubt, check the top inch of soil.” – Master Gardener Susan Jenkins
Fertilization Schedule
Heliotropes are moderate feeders that benefit from regular nutrition:
- At planting: Mix in slow-release fertilizer or compost
- Growing season: Apply balanced liquid fertilizer (10-10-10) every 2-3 weeks
- Late summer: Reduce feeding to prevent leggy growth
- Winter: Suspend fertilization for overwintered plants
Pruning and Maintenance
Regular pruning encourages bushier growth and more abundant flowering:
- Pinch young plants: When they reach 4-6 inches tall, pinch the growing tips
- Deadhead regularly: Remove spent flower clusters to promote continued blooming
- Mid-season trim: Cut back by up to one-third if plants become leggy
- Fall cleanup: Remove diseased material before overwintering
Common Pests and Diseases
Despite being relatively hardy, heliotropes can face several challenges:
Pest Management
| Pest | Signs | Treatment |
|---|---|---|
| Aphids | Clusters on new growth, sticky residue | Insecticidal soap, neem oil spray |
| Spider mites | Fine webbing, stippled leaves | Increase humidity, miticide spray |
| Whiteflies | Tiny white insects flying when disturbed | Yellow sticky traps, insecticidal soap |
| Mealybugs | White cottony masses | Cotton swab with alcohol, insecticidal soap |
Disease Prevention
- Powdery mildew: Improve air circulation, avoid overhead watering
- Root rot: Ensure proper drainage, don’t overwater
- Leaf spot: Remove affected leaves, apply fungicide if severe
- Botrytis: Remove affected plant parts, ensure good ventilation
For more gardening tips about the Care for Heliotropes follow us on Pinterest or Facebbok.
Seasonal Care for Heliotropes
Spring Care
As temperatures warm, it’s time to prepare your heliotropes for the growing season:
- Remove winter protection (for perennial zones)
- Prune away any dead or damaged growth
- Apply fresh compost around established plants
- Begin regular fertilization schedule
- Monitor for early pest issues
Summer Maintenance
Summer is when your heliotropes will be at their peak:
- Water consistently, especially during heat waves
- Deadhead frequently to encourage continuous blooming
- Provide afternoon shade if leaves show signs of scorching
- Apply mulch to retain moisture and keep roots cool
Fall Transition
As temperatures cool, prepare your plants for the changing season:
- Reduce fertilization to avoid tender new growth
- Continue deadheading until frost threatens
- Take cuttings for propagation if desired
- Prepare plants for overwintering
Winter Protection
In zones 9-11, heliotropes can survive winter outdoors with minimal protection. In colder areas:
- Container plants: Move to a bright indoor location before first frost
- Garden plants: Either treat as annuals or dig up and pot before frost
- Overwintering care: Maintain temperatures above 50°F (10°C), reduce watering
- Cutting storage: Take 4-6 inch cuttings in fall and root in water or soil
Creative Uses for Heliotropes in Your Landscape
Garden Design Ideas
Heliotropes can serve as versatile elements in various garden settings:
- Cottage gardens: Mix with complementary perennials like lavender and roses
- Container gardens: Use as a fragrant centerpiece in pots and window boxes
- Border plantings: Place toward the middle of borders for height and fragrance
- Cut flower gardens: Incorporate for their unique clusters and sweet scent
- Sensory gardens: Feature prominently for their distinctive vanilla fragrance
Companion Planting
Some plants pair particularly well with heliotropes:
- Visual companions: Dusty miller, white petunias, yellow marigolds
- Complementary fragrances: Lavender, roses, sweet alyssum
- Beneficial insect attractors: Cosmos, zinnias, sweet basil
Container Growing Tips
Heliotropes excel in container settings with these specifications:
- Use containers at least 12 inches deep with good drainage
- Select high-quality potting mix with added perlite for drainage
- Consider self-watering containers for consistent moisture
- Group with plants that have similar water and light needs
- Move containers to protected locations during extreme weather
Advanced Heliotrope Growing Techniques
Propagation Methods
Stem Cuttings
The most reliable method for creating new plants:
- Take 4-6 inch cuttings from non-flowering stems
- Remove lower leaves, leaving 2-3 sets at top
- Dip cut end in rooting hormone (optional)
- Insert into moist rooting medium
- Cover with clear plastic to maintain humidity
- Keep warm (70-75°F) with bright, indirect light
- Roots should develop in 2-3 weeks
Division
For established plants in warmer zones:
- Dig up plant in early spring
- Gently separate root ball into sections
- Replant divisions promptly
- Water thoroughly after replanting
Creating Heliotrope Standards
For a dramatic display, try growing a heliotrope standard (tree form):
- Select a vigorous young plant
- Insert a strong stake for support
- Choose a single main stem to train upward
- Remove all side shoots along the main stem
- Once desired height is reached (usually 2-3 feet), allow top to branch
- Pinch growing tips of top branches to encourage fullness
- Continue removing any shoots from the main trunk
Hybridizing and Seed Saving
For advanced gardeners interested in developing new varieties:
- Hand pollinate flowers using a small paintbrush
- Allow seed heads to fully develop on plant
- Collect seeds when heads begin to dry
- Store in cool, dry conditions until planting
- Understand that hybrid varieties may not come true from seed
Common Issues Care for Heliotropes
Plant Problems and Solutions
| Problem | Possible Causes | Solutions |
|---|---|---|
| Leggy growth | Insufficient light, too much fertilizer | Move to brighter location, reduce feeding, pinch back |
| Few or no flowers | Too much shade, improper fertilizer | Increase light exposure, use bloom-boosting fertilizer (lower first number) |
| Yellowing leaves | Overwatering, nutrient deficiency | Check drainage, adjust watering schedule, test soil |
| Leaf drop | Temperature shock, drafts, inconsistent water | Maintain stable environment, consistent care routine |
| Curling leaves | Pest infestation, heat stress | Check undersides for pests, provide afternoon shade |
Reviving Struggling Plants
Even experienced gardeners occasionally face challenges with heliotropes. To rescue struggling plants:
- Identify the specific issue (overwatering, pests, etc.)
- Take immediate corrective action
- Trim away severely affected parts
- Adjust care practices as needed
- Be patient—recovery may take several weeks
Conclusion
Growing heliotropes offers rewards that go beyond their beautiful appearance—their intoxicating vanilla-cherry pie scent creates a sensory garden experience unlike any other. With proper care and attention to their specific needs, these charming plants can become stunning focal points in your garden, bringing joy throughout the growing season.
Whether you’re growing them in containers on a sunny patio, incorporating them into mixed borders, or creating a fragrance garden, heliotropes’ distinctive clusters of purple, blue, or white flowers will draw compliments from visitors and provide endless enjoyment. Their sun-tracking habit—always turning their face toward the light—serves as a gentle reminder to gardeners everywhere to seek out brightness and warmth in our own lives.
The next time you’re planning your garden, consider adding these beautiful, fragrant blooms. With the knowledge you’ve gained from this guide, you’ll be well-equipped to grow and care for heliotropes successfully, creating a garden that delights both the eyes and the nose.
FAQ: Growing and Caring for Heliotropes
How often should I water my heliotropes?
Water heliotropes when the top inch of soil feels dry to the touch. This typically means watering every 2-3 days during normal conditions, and possibly daily during hot weather, especially for container plants. Always water at the base to keep foliage dry.
Why aren’t my heliotropes flowering?
Insufficient light is the most common reason heliotropes fail to flower. These plants need at least 6 hours of direct sunlight daily to produce abundant blooms. Other factors include overfeeding with nitrogen-heavy fertilizer, improper pruning, or extreme temperatures.
Are heliotropes annual or perennial plants?
Heliotropes are technically tender perennials in USDA zones 9-11 but are commonly grown as annuals in cooler regions. In frost-free areas, they can grow for several years, developing woody stems and reaching heights of 3-4 feet.
How can I successfully grow and care for heliotropes indoors?
To grow and care for heliotropes indoors, place them in your brightest window (preferably south-facing), maintain temperatures between 65-75°F, provide humidity through misting or a pebble tray, water when the top inch of soil dries, and feed monthly with diluted balanced fertilizer during the growing season.
When is the best time to take heliotrope cuttings?
The best time to take heliotrope cuttings is in late summer or early fall when the plants are actively growing but not stressed by extreme heat. Morning is the optimal time of day to take cuttings when plants are well-hydrated.