There’s something truly magical about stepping into your garden, scissors in hand, to snip fresh herbs for tonight’s dinner. The vibrant colors, the intoxicating aromas, and the promise of flavor they bring to our meals connect us to a tradition as old as cooking itself. But what happens when summer fades and your herb garden produces more than you can possibly use? Learning how to properly dry and store fresh garden herbs becomes essential to preserving that garden-fresh goodness all year round.
As someone who has watched countless harvests wither away due to improper storage techniques, I understand the heartbreak of seeing those precious herbs go to waste. The good news is that with a few simple techniques and tools, you can capture and preserve the essence of your herb garden to enjoy during the coldest winter months, bringing a taste of summer to your kitchen when you need it most.
In this comprehensive guide, I’ll walk you through everything you need to know about drying and storing fresh garden herbs so you can make the most of your harvest and enjoy homegrown flavors in every season.
Table of Contents
Understanding the Benefits of Drying Your Own Herbs
Before we dive into the techniques, let’s talk about why drying your own herbs is worth the effort:
- Superior flavor compared to store-bought dried herbs
- Significant cost savings over purchasing dried herbs
- Complete control over growing conditions and avoiding pesticides
- Reduction of food waste from your garden
- Preservation of unique varieties not commonly found in stores
- Connection to seasonal rhythms and traditional food preservation
- Satisfaction of cooking with herbs you’ve grown and preserved yourself
According to a recent study by the University of Illinois Extension, home-dried herbs can retain up to 95% of their essential oils when properly processed, compared to commercially dried herbs which often lose significant flavor during industrial processing and extended shelf time.
When to Harvest Herbs for Optimal Drying Results
The Perfect Timing for Maximum Flavor
The timing of your harvest dramatically impacts the quality of your dried herbs. For most herbs, the ideal time to harvest is:
- Morning hours (after dew has dried but before the heat of the day)
- Just before flowering when oil concentration is highest
- During dry weather conditions to avoid excess moisture
- After several days without rain to ensure plants aren’t waterlogged
“Harvest herbs at their peak of oil concentration—typically just as flower buds form but before they open—to capture the most intense flavors and aromas.” – Dr. Linda Chalker-Scott, Extension Horticulturist
Herb-Specific Harvesting Guidelines
Different herbs have unique optimal harvesting windows:
| Herb Type | Best Time to Harvest | Special Considerations |
|---|---|---|
| Basil | Before flowering | Harvest regularly to prevent flowering |
| Rosemary | Any time during growing season | More potent in mid-summer |
| Thyme | Just before or during early flowering | Morning harvest preferred |
| Oregano | When flower buds first appear | Cut stems 5-6 inches from top |
| Mint | Before flowering, young leaves | Harvest frequently for continued growth |
| Sage | Before or during early flowering | Second-year plants have stronger flavor |
| Dill | Seeds when they turn brown, leaves anytime | Different uses require different timing |
| Parsley | Outer stems when plant is robust | More flavor later in season |
Essential Tools for Herb Drying
Before you begin the drying process, gather these helpful tools:
- Sharp scissors or pruning shears for clean cuts that minimize damage
- String, twine, or rubber bands for bundling herbs
- Paper bags (optional, for seed collection and dust protection)
- Drying racks or screens with food-safe materials
- Dehydrator (optional but efficient)
- Microwave (for quick drying in small batches)
- Oven with very low temperature settings
- Clean, airtight containers for storage
- Labels and markers for organization
- Silica gel packets (optional, to maintain dryness)
Four Effective Methods to Dry Fresh Garden Herbs
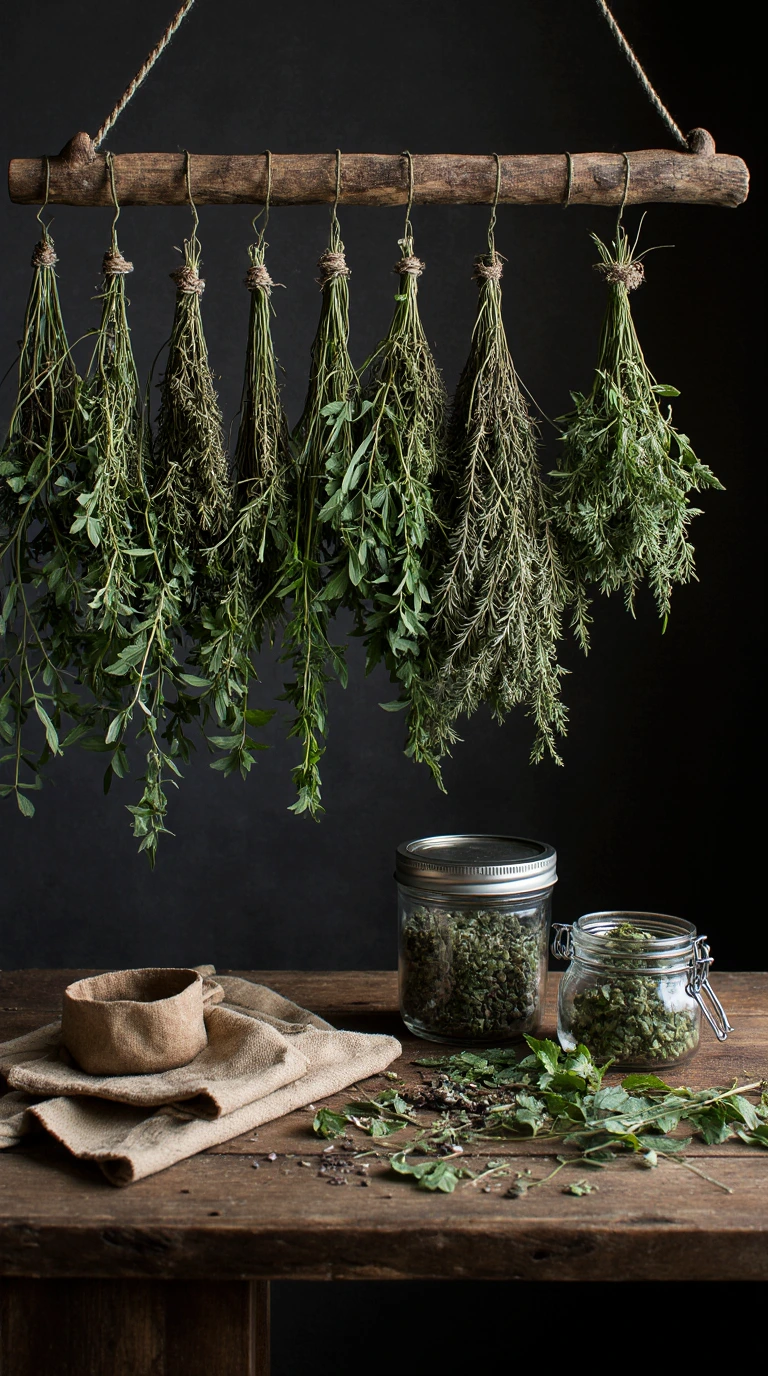
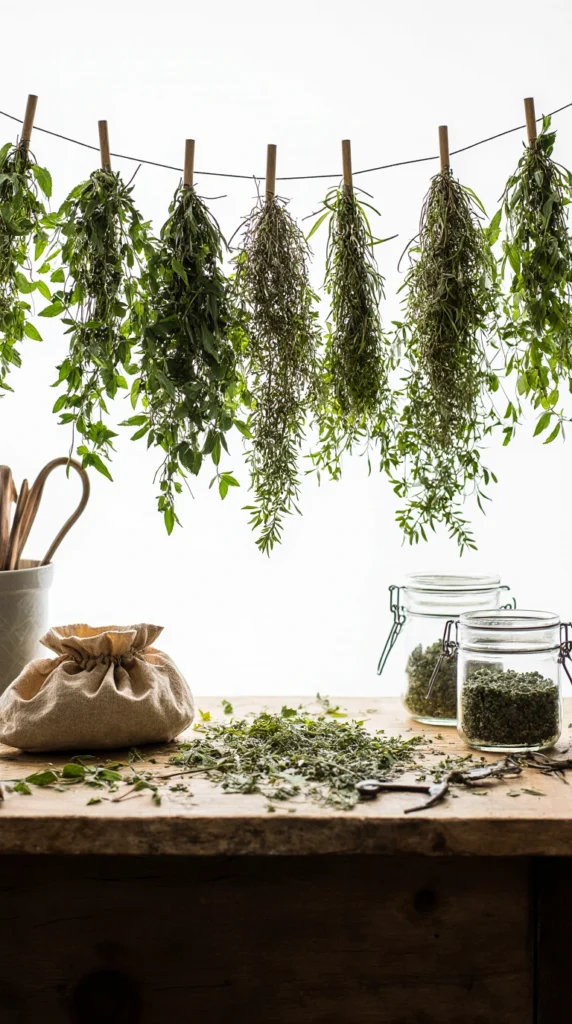
1. Air-Drying: The Traditional Approach
Air-drying is the oldest and most natural method for preserving herbs, requiring minimal equipment and energy.
Perfect for:
- Herbs with lower moisture content (rosemary, thyme, oregano, sage, bay leaves)
- Those seeking traditional preservation techniques
- Households with appropriate drying spaces
Step-by-Step Process:
- Gather small bunches of 5-10 stems, removing damaged or diseased leaves
- Secure stems together with twine, string, or rubber bands
- Hang bundles upside down in a warm, dry location away from direct sunlight
- Ensure good air circulation around bundles
- Cover with paper bags (with holes for ventilation) if dust is a concern
- Allow to dry for 1-3 weeks, depending on herb type and environmental conditions
- Test for dryness by crushing a leaf—it should crumble easily
Pro Tip:
Place heavier herbs like rosemary on the outside of your bundles and more delicate herbs in the center for more even drying.
2. Dehydrator Method: Fast and Efficient
Dehydrators provide controlled temperature and airflow, making them ideal for humid climates or when speed matters.
Perfect for:
- High-moisture herbs (basil, mint, tarragon)
- Humid environments where air-drying is challenging
- Those needing quick results
Step-by-Step Process:
- Wash herbs gently if necessary and pat completely dry
- Remove leaves from woody stems
- Arrange herbs in a single layer on dehydrator trays
- Set temperature between 95°F-115°F (35°C-46°C)
- Dry for 1-4 hours, checking regularly
- Rotate trays if your dehydrator doesn’t have a fan
Temperature Guide for Herb Dehydration:
| Herb Type | Temperature | Approximate Drying Time |
|---|---|---|
| Delicate (basil, mint) | 95°F (35°C) | 1-2 hours |
| Medium (parsley, cilantro) | 105°F (40°C) | 2-3 hours |
| Robust (rosemary, sage) | 115°F (46°C) | 3-4 hours |
3. Oven Drying: Convenient but Requires Attention
Using your oven can be an excellent option when a dehydrator isn’t available but requires careful temperature control.
Perfect for:
- Those without dedicated drying space
- Small batches of herbs
- Cooler or humid climates
Step-by-Step Process:
- Preheat oven to lowest setting (ideally below 180°F/82°C)
- Strip leaves from stems and arrange in a single layer on baking sheets
- Place herbs in the oven with the door slightly ajar to allow moisture to escape
- Check every 30 minutes, rotating as needed
- Remove when completely dry and crisp (typically 1-4 hours)
Important Caution:
Many ovens cannot maintain temperatures low enough for optimal herb drying. Use an oven thermometer to verify temperature and monitor herbs carefully to prevent burning, which destroys essential oils and flavor.

4. Microwave Drying: The Emergency Method
When you need dried herbs immediately or have very small quantities, the microwave offers a quick solution.
Perfect for:
- Very small quantities of herbs
- Immediate needs
- Testing varieties before drying larger batches
Step-by-Step Process:
- Place herb leaves in a single layer between two paper towels
- Microwave on HIGH for 30 seconds
- Check herbs and continue in 15-second increments until completely dry
- Allow to cool completely before storing
Pro Tip:
This method works best with small batches of a single herb type at a time. The quick drying time helps preserve good color but can sometimes result in slightly less flavor than slower methods.
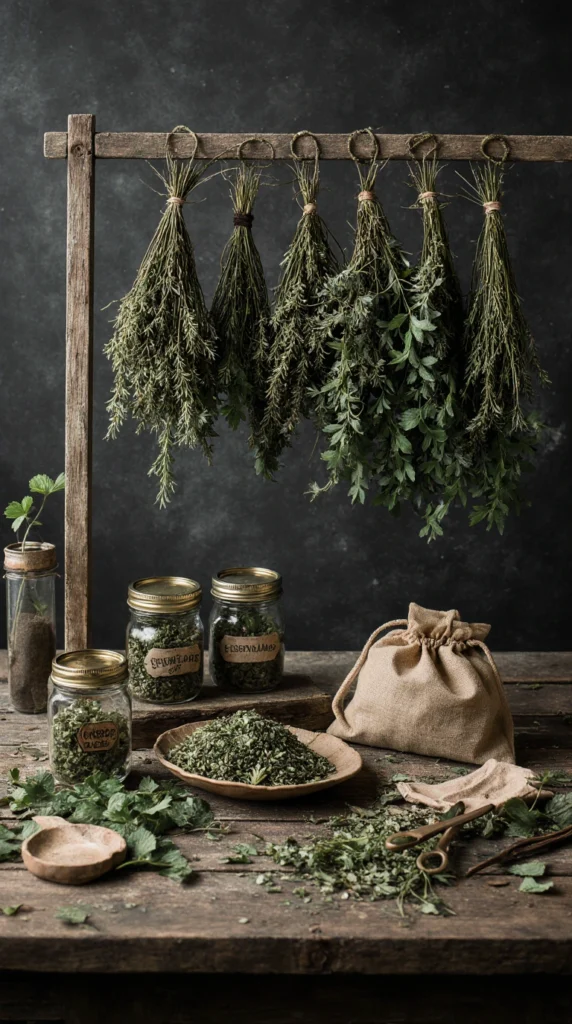
Proper Storage Techniques for Maximum Shelf Life
All your careful drying efforts can go to waste without proper storage techniques. Here’s how to ensure your herbs stay flavorful for months to come:
Container Selection
The right storage container makes a significant difference in herb longevity:
- Glass jars with tight-fitting lids are ideal (amber or dark glass protects from light)
- Metal tins work well for short-term storage
- Avoid plastic containers which can absorb and transfer odors
- Never use paper bags for long-term storage as they allow air and moisture to enter
Location Matters
Where you store your dried herbs impacts their flavor retention:
- Cool location (ideally 55-70°F/13-21°C)
- Dark cupboard or pantry away from direct light
- Away from heat sources like stoves, ovens, or refrigerator tops
- Low humidity environment to prevent moisture reabsorption
- Not near strong odors that herbs can absorb
Processing for Storage
Before placing herbs in storage containers:
- Make sure herbs are completely dry (any moisture leads to mold)
- Either keep leaves whole or crumble just before storing
- Remove all stems unless they contain flavor (like with dill or fennel)
- Label containers with herb name and harvest date
- For maximum potency, consider keeping leaves whole until use
Shelf Life Expectations
Properly dried and stored herbs don’t “spoil” in the traditional sense but do lose potency over time:
| Herb Type | Expected Shelf Life | Signs of Quality Loss |
|---|---|---|
| Leafy herbs (basil, cilantro) | 6-12 months | Fading color, diminished aroma |
| Robust herbs (rosemary, thyme) | 1-3 years | Significantly reduced fragrance |
| Seed herbs (dill, fennel) | 2-3 years | Dull appearance, weak aroma |
| Flower herbs (lavender, chamomile) | 1-2 years | Color fading, flavor weakening |
“The most important factor in herb storage isn’t the duration but the quality. If your dried herbs have little aroma when crushed between your fingers, it’s time to replace them regardless of how recently they were dried.” – Alton Brown, Culinary Scientist
Creative Ways to Use Your Dried Herbs
Now that you’ve mastered drying and storing your herbs, here are some fantastic ways to enjoy them:
Culinary Applications
- Create custom herb blends (Italian, Herbs de Provence, taco seasoning)
- Make herb-infused oils, vinegars, and honeys
- Prepare herb butter or compound butters for freezing
- Create herb-infused salts or sugars
- Make tea blends from mint, lemon balm, or chamomile
Beyond the Kitchen
- Craft herbal sachets for drawers and closets
- Create homemade potpourri blends
- Make herb-infused bath products
- Create natural household cleaners
- Develop herbal crafts like wreaths or wands
Common Mistakes to Avoid When Drying and Storing Herbs
Learn from others’ mistakes to ensure your herbs remain flavorful and aromatic:
- Harvesting at incorrect times (after flowering or in wet conditions)
- Failing to remove damaged leaves before drying
- Drying at too high temperatures which volatilizes essential oils
- Not ensuring complete dryness before storage
- Using improper containers that allow moisture or light
- Crushing herbs before storage rather than keeping them whole
- Storing in humid environments which causes rehydration
- Forgetting to label varieties and dates
- Keeping herbs past their prime instead of replacing annually
Conclusion: Embracing the Cycle of Growth and Preservation
Learning how to dry and store fresh garden herbs connects us to ancient traditions of food preservation while providing practical benefits in our modern kitchens. The process of growing, harvesting, drying, and storing herbs creates a fulfilling cycle that reduces waste, saves money, and enhances our cooking throughout the year.
As you perfect your techniques for drying and storing herbs, you’ll develop an intuitive understanding of each plant’s unique characteristics. This knowledge deepens your connection to the food you prepare and the natural cycles that sustain us.
Remember that each dried herb carries within it the sunshine, rain, and care that went into its growth. When you open a jar of home-dried oregano in the depths of winter and that Mediterranean aroma fills your kitchen, you’re experiencing more than just flavor—you’re capturing a moment from summer that nourishes both body and spirit.
For more gardening tips follow us on Pinterest
Frequently Asked Questions About Drying and Storing Fresh Garden Herbs
How to dry and store fresh herbs?
To dry herbs, you can hang them upside down in small bunches in a warm, well-ventilated area away from direct sunlight. Once fully dry and crumbly, store them in airtight containers like glass jars or tins, away from heat and moisture to preserve their flavor.
Is it better to freeze or dry fresh herbs?
It depends on the herb. Woodier herbs like rosemary, thyme, oregano, and sage dry well and retain their flavor. Tender herbs like basil, cilantro, and dill are better frozen to preserve their fresh taste and color.
Which herbs should not be dried?
Some herbs, like basil, chives, cilantro, and parsley, tend to lose their flavor or turn bitter when dried. These are often better preserved by freezing in oil or water in ice cube trays.
How do I convert fresh herbs to dry herbs?
The general rule is: 1 tablespoon of fresh herbs = 1 teaspoon of dried herbs. Because dried herbs are more concentrated, use about one-third of the fresh amount in recipes.
What’s the best way to store dry herbs?
Store dried herbs in airtight containers in a cool, dark place—such as a pantry or spice cabinet. Avoid plastic bags, and label each container with the herb name and date for freshness tracking. For best flavor, use within 6 to 12 months.
How is the best way to dry herbs?
Air-drying is the most traditional and gentle method. However, you can also use a dehydrator or an oven on the lowest setting to speed up the process. Just be careful not to overheat, as that can reduce essential oils and flavor.
How can I tell if my dried herbs have gone bad?
Dried herbs typically don’t become unsafe to eat but do lose potency. If your dried herbs have little to no aroma when crushed, appear discolored, or show any signs of mold, it’s time to replace them. Quality dried herbs should maintain vibrant color and release a strong aroma when crushed.
What’s the best method for drying fresh garden herbs with high moisture content like basil?
For high-moisture herbs like basil, mint, or tarragon, a dehydrator is the most reliable method. These herbs can develop mold when air-dried in humid environments. If you don’t have a dehydrator, the oven method with very low heat and good air circulation works well. Avoid using the microwave for these herbs as they can easily burn.
Should I wash my herbs before drying them?
Generally, it’s best to avoid washing herbs before drying unless they’re visibly dirty. Washing introduces moisture that extends drying time and can promote mold growth. If washing is necessary, do so gently, pat completely dry with towels, and allow surface moisture to evaporate before beginning the drying process.
How do I know when my herbs are dry enough for storage?
Properly dried herbs should crumble easily when rubbed between your fingers. Stems should snap rather than bend, and leaves should be crisp, not pliable. If there’s any hint of flexibility or coolness (indicating moisture), continue drying to prevent mold development during storage.
What’s the best way to dry and store fresh garden herbs for tea?
For herbal teas, dry the herbs completely using any method, but keep the leaves whole rather than crumbled to preserve essential oils. Store in airtight glass containers away from light. Mint, lemon balm, chamomile, and lavender are excellent tea herbs that maintain their flavor profile well when properly dried and stored.