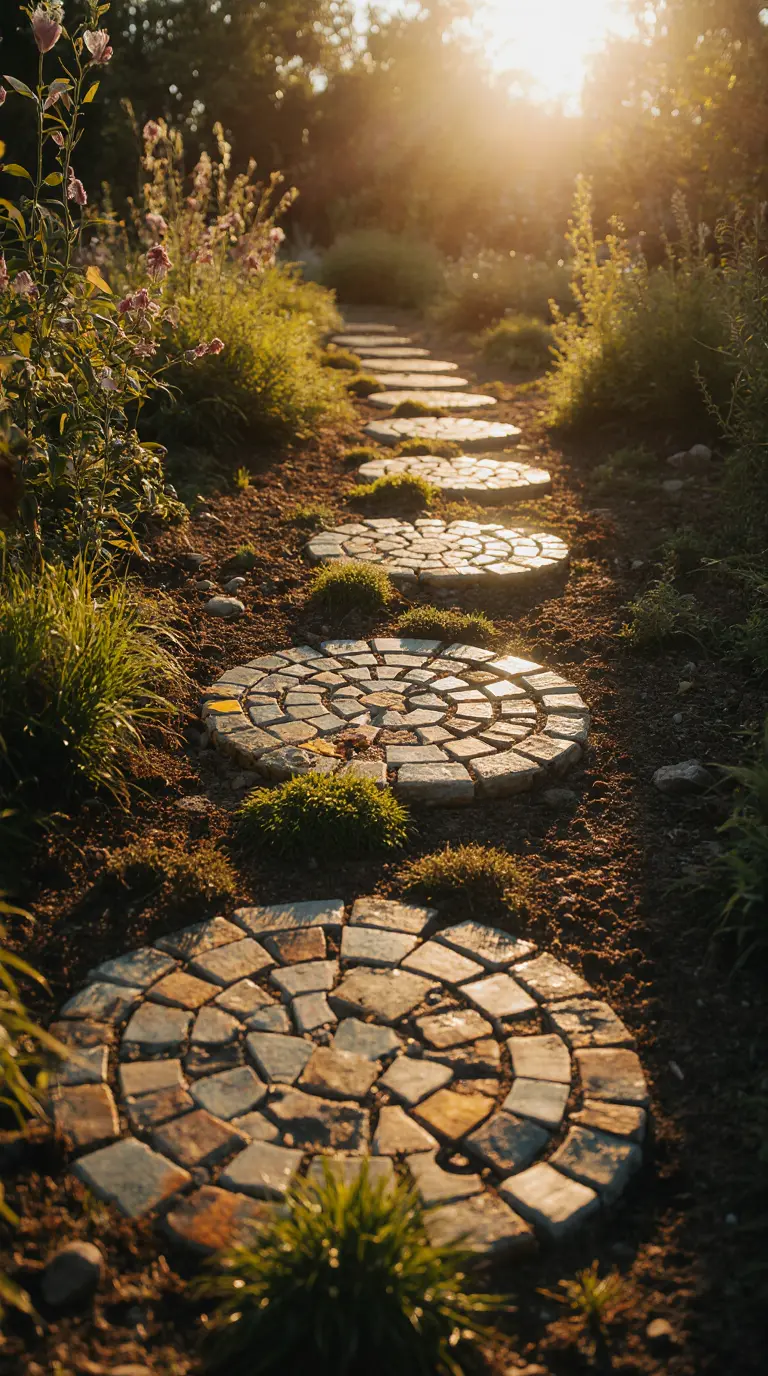
There’s something magical about creating a path through your garden—each step becomes a journey, each stone a personal mark on your landscape. I still remember placing my first homemade stepping stone, feeling the satisfaction as it nestled perfectly between my herb garden and rose bushes. These aren’t just functional elements; they’re personal expressions that guide visitors through the story of your garden while keeping muddy shoes at bay.
Whether you’re a seasoned gardener or a weekend DIY enthusiast, crafting your own stepping stones connects you deeply to your outdoor space. From simple concrete rounds to elaborate mosaic masterpieces, homemade stepping stones offer endless possibilities to enhance your garden’s charm while providing practical pathways that protect your precious plants from foot traffic.
In this comprehensive guide, I’ll walk you through everything you need to know about creating beautiful, durable stepping stones that will transform your garden into a personalized outdoor sanctuary.
Table of Contents
Why Create Homemade Stepping Stones for Your Garden?
Homemade stepping stones offer numerous benefits that extend far beyond their decorative appeal:
- Personal Expression: Each stone can reflect your personality, interests, or family memories
- Cost-Effectiveness: DIY stepping stones typically cost 50-80% less than store-bought options
- Customization: Control over size, shape, color, and design to perfectly complement your garden aesthetic
- Family Activity: An excellent project to involve children and create lasting memories
- Practical Pathways: Guide foot traffic and protect lawns and garden beds from damage
- Sustainable Gardening: Opportunity to recycle materials and reduce environmental impact
A survey by the National Gardening Association found that personalized garden elements like homemade stepping stones increase property values by up to 7% while significantly boosting homeowner satisfaction with their outdoor spaces.
Essential Materials and Tools for DIY Stepping Stones
Basic Materials
Before you begin your stepping stone project, gather these essential materials:
| Material | Purpose | Approximate Cost |
|---|---|---|
| Quick-setting concrete mix | Main structure of the stone | $5-10 per 20lb bag |
| Molds (commercial or repurposed) | Shape your stepping stones | $5-20 each or free if repurposed |
| Water | Activates the concrete mix | Free |
| Concrete sealer | Protects finished stones from weather | $15-30 per container |
| Decorative elements | Personalization (optional) | Varies ($0-50) |
| Release agent (cooking spray, petroleum jelly) | Prevents sticking to mold | $2-5 |
Essential Tools
These tools will make your stepping stone creation process much smoother:
- Mixing bucket or wheelbarrow
- Measuring cup for water
- Stirring stick or small garden trowel
- Rubber gloves
- Protective eyewear
- Level
- Rubber mallet (for tapping out air bubbles)
Decorative Elements for Personalization
The magic of homemade stepping stones lies in personalization. Consider these decorative options:
- Glass gems or marbles
- Ceramic tiles or broken china
- Seashells or beach glass
- Children’s handprints or footprints
- Meaningful text or dates
- Natural elements like leaves (for imprinting)
- Colored concrete pigments
- Mosaic pieces
Step-by-Step Guide to Making Basic Concrete Stepping Stones
Preparation Phase
Choose your location: Decide where your stepping stones will be placed and measure the area to determine how many stones you’ll need
Select your mold: Commercial molds offer consistent results, but household items like cake pans, plastic plant saucers, or even large plastic lids work well for beginners
Prepare your workspace: Cover your work surface with plastic sheeting or newspaper. Work outdoors or in a well-ventilated area.
Apply release agent: Coat the inside of your mold with cooking spray, petroleum jelly, or commercial release agent to ensure easy removal later.
Mixing and Pouring
Mix the concrete: Following package instructions, combine quick-setting concrete mix with water in your bucket. Aim for a thick oatmeal consistency—not too runny, not too dry.
Pour the mixture: Fill your mold about 2 inches deep, tapping the sides gently to release air bubbles.
Level the surface: Use a straight edge (like a piece of wood) to scrape across the top of the mold, creating a level surface.
“The secret to successful stepping stones is patience during the mixing phase—take your time to achieve that perfect consistency where the concrete holds its shape but remains workable.” – Master Gardener, Sarah Johnson
Decorating Your Stone
Timing is crucial: Wait until the concrete begins to set but is still impressionable (usually 10-30 minutes, depending on conditions and mix).
Add decorative elements: Press glass pieces, tiles, or other decorations into the surface. For text, use letter stamps or carefully inscribe with a stick.
Create handprints or footprints: If including these personal touches, press hands or feet gently but firmly into the partially set concrete.
Curing and Finishing
Initial curing: Allow the stepping stone to remain undisturbed in the mold for at least 24-48 hours.
Unmolding: Carefully flip the mold upside down and gently tap to release the stone. If resistance occurs, don’t force it—try running a thin plastic knife around the edges.
Complete curing: Let the stone cure for an additional 4-7 days before placing it in your garden.
Sealing: Apply concrete sealer following manufacturer directions to protect your creation from weather damage.
Creative Homemade Stepping Stone Ideas and Designs
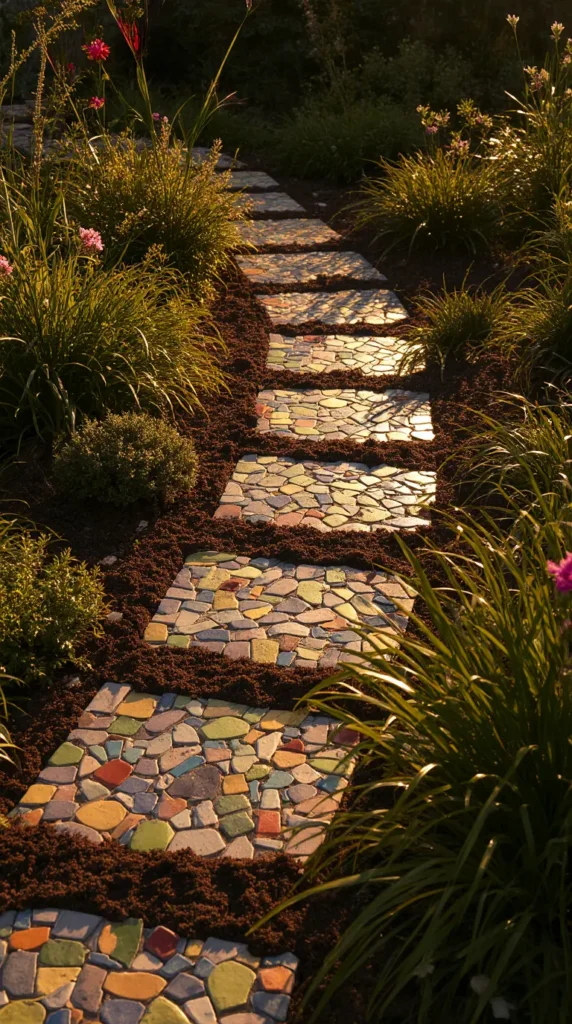
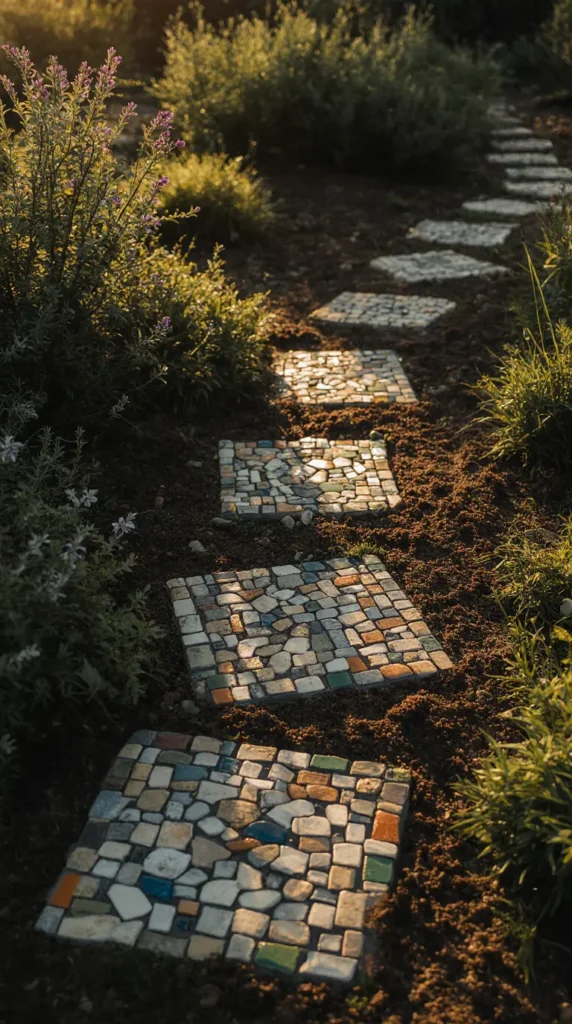
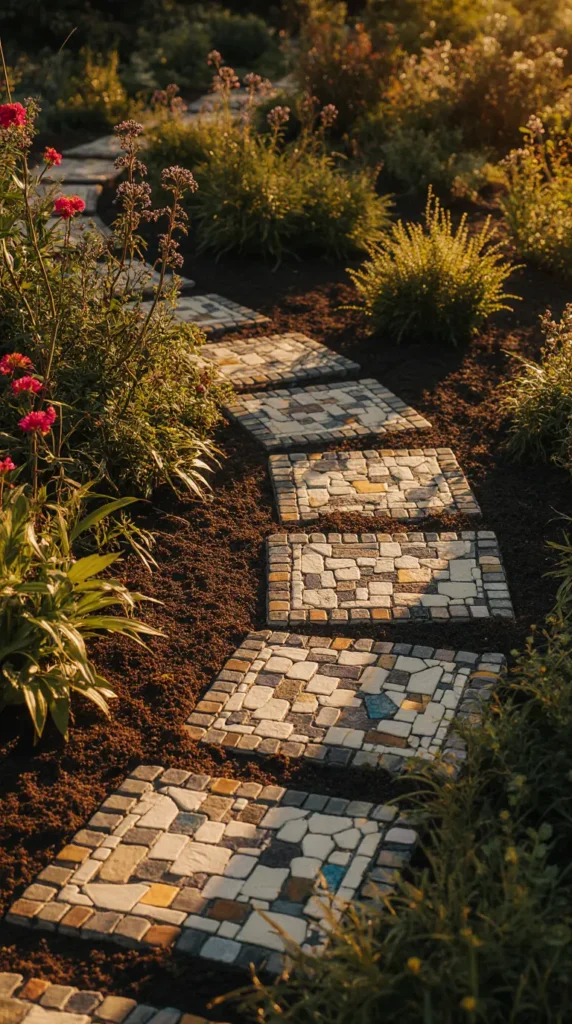
Mosaic Masterpieces
Mosaic stepping stones offer limitless creative possibilities and create stunning focal points in any garden path.
Materials Needed:
- Basic concrete supplies
- Broken china, tiles, or colored glass pieces
- Tile nippers (for cutting pieces)
- Tile grout
- Grout sealer
Process Highlights:
- Arrange your mosaic design on paper before beginning
- Pour a base layer of concrete and let it partially set
- Place mosaic pieces according to your design
- Pour a thin layer of concrete between pieces or apply grout after curing
- Seal thoroughly to protect your artwork
Nature-Inspired Impressions
These organic stepping stones celebrate the beautiful details of nature.
Ideas to Try:
- Press large leaves into concrete for detailed vein patterns
- Create fossil-like impressions using ferns, flowers, or small branches
- Incorporate actual stones, pebbles, or shells into the design
- Use natural concrete pigments to mimic earth tones
Memory Stones and Family Projects
Create meaningful garden elements that capture special moments.
Family-Friendly Options:
- Handprints or footprints with dates
- Children’s artwork pressed into concrete
- Commemoration stones for special occasions
- Pet paw prints
- Family names or birthdates
Glow-in-the-Dark Pathways
Add magic to your garden with stones that illuminate your path at night.
Materials:
- Standard concrete supplies
- Glow-in-the-dark aggregates or powders
- UV-resistant sealer
Implementation Tips:
- Mix glow powder with clear epoxy resin
- Create pocket areas in concrete for glow material
- Place in areas that receive sunlight during day for best nighttime effect
- Apply multiple coats of UV-resistant sealer
Placing and Maintaining Your Homemade Stepping Stones
Optimal Placement Techniques
Proper installation ensures your stepping stones will remain stable and functional for years.
Planning Your Path:
- Space stones at a comfortable walking distance (typically 24-30 inches center to center)
- Create gentle curves rather than straight lines for visual interest
- Consider garden views and destinations when planning placement
Installation Methods:
- Floating Method: Simply place stones on level ground, ideal for temporary placement
- Excavation Method: Dig shallow depressions the size of each stone, place stone, and ensure it’s level with ground
- Sand Base Method: Create a 2-inch sand base beneath each stone for drainage and stability
Seasonal Care and Maintenance
Protect your investment with these maintenance practices:
| Season | Maintenance Tasks |
|---|---|
| Spring | Clean with gentle brush and water; check for winter damage; reapply sealer if needed |
| Summer | Remove debris and check for plant overgrowth; lightly pressure wash if needed |
| Fall | Clear leaves and debris; ensure proper drainage around stones |
| Winter | Avoid using harsh de-icers; carefully remove snow with plastic shovel |
Troubleshooting Common Issues:
- Sinking stones: Reset with additional sand or gravel beneath
- Cracking: Small cracks can be filled with concrete patch; replace severely damaged stones
- Moss growth: Decide whether to remove (use vinegar solution) or encourage for aesthetic effect
- Fading: Reapply concrete sealer or decorative paint as needed
Advanced Techniques for Experienced DIYers
Multi-Level Stepping Stone Projects
Create dynamic garden elements by combining different heights and textures:
- Tiered stepping stones: Create two-level stones with central plateaus
- Integrated lighting: Embed solar lights or LED strips into recessed areas
- Water features: Design hollow centers for mini water gardens or bird baths
Large-Scale Path Projects
Transform your entire garden with these comprehensive approaches:
Materials Calculation:
For larger projects, use this formula to determine materials needed:
Number of stones = Total path length (in feet) ÷ (Stone diameter + Desired gap)
Concrete needed (in bags) = Number of stones × Average stone volume ÷ Volume per bag
Efficiency Tips:
- Create multiple molds to work in batches
- Set up an assembly line workflow
- Consider renting a small concrete mixer for large projects
- Enlist friends for a “stepping stone party”
Environmental Considerations for Sustainable Garden Paths
Eco-Friendly Materials and Practices
Minimize environmental impact with these sustainable approaches:
Sustainable Material Options:
- Hypertufa (lighter alternative to concrete made with peat moss)
- Recycled concrete or construction waste
- Natural stone set in sand or gravel
- Broken concrete (“urbanite”) from demolition projects
Water Management:
- Create permeable paths that allow water penetration
- Design stepping stones with drainage gaps between
- Incorporate rain garden elements alongside your path
Integrating Stepping Stones with Garden Ecosystems
Design paths that enhance your garden’s biodiversity:
- Plant creeping thyme, moss, or low-growing sedums between stones
- Create insect habitats in the gaps between stepping stones
- Position stones to avoid disturbing root systems of established plants
- Use locally-sourced materials that complement native ecosystems
FAQ About Homemade Stepping Stones
How long do homemade stepping stones typically last?
Properly made homemade stepping stones can last 10-20 years when sealed correctly and maintained regularly. Factors affecting longevity include concrete quality, weather exposure, and placement stability. Annual sealing extends lifespan considerably.
Can I make homemade stepping stones in winter?
Creating homemade stepping stones in winter is challenging but possible if working indoors. Concrete requires temperatures above 50°F (10°C) to cure properly. If making stones indoors, ensure adequate ventilation and protection for surfaces, then allow full curing before exposing to freezing temperatures.
What’s the best way to fix a cracked homemade stepping stone?
For minor cracks in homemade stepping stones, apply concrete patch product following package directions. For structural cracks, consider reinforcing with hardware cloth in a new layer of concrete over the original. Severely damaged stones typically need replacement, but fragments can be repurposed into new mosaic stepping stones.
How do I prevent weeds from growing between my stepping stones?
Prevent weeds between homemade stepping stones by laying landscape fabric beneath the entire path area, using polymeric sand between stones, or regularly applying natural weed deterrents like vinegar solution. Alternatively, plant desirable ground covers like creeping thyme that will outcompete weeds.
Are homemade stepping stones safe for children and pets?
Homemade stepping stones are generally safe for children and pets when properly installed. Ensure surfaces are smooth without sharp edges, use non-toxic sealers, and avoid decorative elements that could become dislodged. Test stability regularly and keep stones level with ground to prevent tripping hazards
Conclusion: Creating Paths and Memories with Homemade Stepping Stones
As you embark on your homemade stepping stone journey, remember that you’re creating more than just a garden path—you’re crafting memories, personalizing your space, and building a lasting connection to your outdoor sanctuary. Each stone becomes a chapter in your garden’s story, guiding visitors through your green space while reflecting your creativity and care.
Whether you opt for simple concrete rounds or elaborate mosaic masterpieces, the process of making and placing these stones will deepen your relationship with your garden. The satisfaction of seeing your handiwork withstand the seasons—perhaps even outlasting your time in that home—makes this project particularly meaningful.
I encourage you to gather your materials, invite family or friends to participate, and begin your stepping stone adventure. Start simple, experiment freely, and don’t worry about perfection. Like gardens themselves, the most charming stepping stones often embrace a touch of natural imperfection.
What stepping stone design will you try first? How might these personalized pathways transform not just your garden’s appearance, but your experience of moving through and connecting with your outdoor space?
For more gardening tips follow us on Pinterest